Preparation Before Installing Vinyl Plank Flooring
Subfloor Assessment
Assessing the subfloor ensures a clean, dry, stable base, crucial for a successful installation. Identify and address any unevenness to avoid issues. Proper subfloor preparation lays the groundwork for a flawless and long-lasting finish.
Moisture Testing
Test for moisture, particularly in basements, to prevent warping and voided warranties. Maintain levels below 5% for optimal results. Precise moisture control safeguards against costly repairs and extends the flooring’s lifespan.
Room Measurement and Planning
Accurate measurements minimize waste and optimize material use, influencing layout and ensuring smooth workflow. Thoughtful planning enhances spatial aesthetics and functional flow within the living space.
Acclimating the Planks
Acclimate planks for at least 48 hours to align with the room climate, preventing post-installation warping. This step mitigates material stress due to temperature and humidity changes.
Gathering Necessary Tools
Preparation with essential tools like a tape measure and a rubber mallet facilitates precise installation. Having the right tools on hand ensures efficiency and reduces the risk of errors.
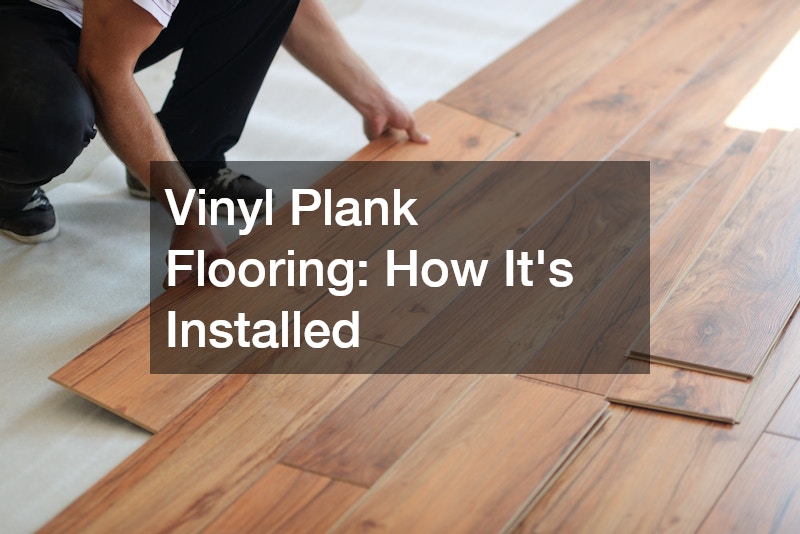
Installing Vinyl Plank Flooring
Planning Layout and Pattern
Consider plank orientation and patterns for aesthetic and practical benefits, highlighting room features. A strategic design can dramatically enhance the room’s visual dynamics.
Installing the First Row
Lay the first row carefully for alignment, using spacers for expansion. Precision here ensures seamless progression. Setting a strong baseline helps guide subsequent rows for a harmonious finish.
Joining and Locking Planks
Use a tongue-and-groove mechanism for a floating floor, ensuring tight joins with a rubber mallet for durability. Properly interlocked planks provide a stable and unified surface over time.
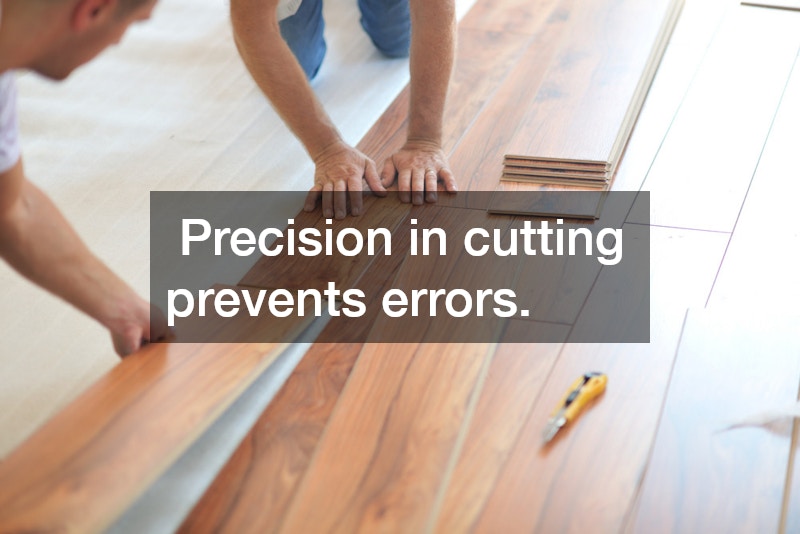
Cutting to Fit Around Objects
Use a utility knife for precision cutting around obstacles, maintaining visual harmony. Custom fitting around immovable structures enhances both aesthetics and functional fit.
Finalizing the Installation
Secure all planks and ensure edges accommodate movement, concluding with a thorough check for seamless completion. Final inspections confirm uniformity and address any overlooked details.
Finishing Touches After Installation
Trimming and Moulding
Add trims and moulding for a polished look and protection, enhancing both appeal and function. These elements frame the flooring, completing the room’s design.
Cleaning the Surface
Clean with mild, non-abrasive cleaners to maintain surface quality before furniture placement. Regular upkeep preserves the flooring’s vibrant appearance and texture.
Inspecting for Gaps
Check for gaps or imperfections, rectifying them for a precise finish. Attention to detail in this stage ensures the desired craftsmanship quality is achieved.
Securing Edges
Install transition strips for stability and a smooth transition to other flooring types. Well-secured transitions prevent tripping hazards and raise the overall durability.
Conducting a Final Walkthrough
Evaluate the installation for consistency and integrity, confirming design and craftsmanship standards. A comprehensive review endorses the success of the installation process.
Maintaining Vinyl Plank Flooring
Regular Cleaning
Routine cleaning preserves appearance and prevents dirt buildup, using appropriate tools and cleaners. Consistent maintenance keeps the flooring looking as pristine as the day it was installed.
Dealing with Scratches
Use preventive measures and repair kits to manage scratches, maintaining the floor’s elegance. Proactive actions protect your investment and uphold aesthetic charm.
Moisture Control
Manage moisture to prevent warping, ensuring longevity despite natural resistance. Vigilant moisture management supports the flooring’s structural health.
Avoiding Heavy Impacts
Handle heavy items carefully to prevent dents, distributing weight to minimize impact. Protective measures maintain surface integrity and appeal.
Re-Coating Options
Consider professional re-coating to restore gloss if worn, extending the floor’s beauty. Professional services rejuvenate the finish, safeguarding the floor’s lifecycle.
Common Mistakes to Avoid During Installation
Ignoring Proper Measurement
Ensure precise measurements to avoid material shortages and poor layout planning. The accuracy of preliminary steps greatly affects the project outcome.
Skipping Acclimation
Acclimate planks to avert gapping or buckling, ensuring structural integrity. Recognizing environmental effects on materials avoids preventable issues.
Neglecting Underlayment
Install underlayment for insulation and soundproofing, enhancing comfort and durability. A solid underlayer optimizes both the feel and sustainability of the installation.
Improper Cutting Techniques
Utilize correct cutting tools and techniques for neat fits, following guidelines. Precision in cutting prevents errors.
Failing to Leave Expansion Gaps
Maintain expansion gaps to prevent buckling, discreetly covered by trims. Understanding the importance of expansion anchors long-term stability.